Just finished a Viking Tactics 1.5 Carbine 3 day course held at Metcalfe range in San Jose with Kyle Lamb.
All I can say is it's intense. I learned a lot of stuff and met a great group of people.
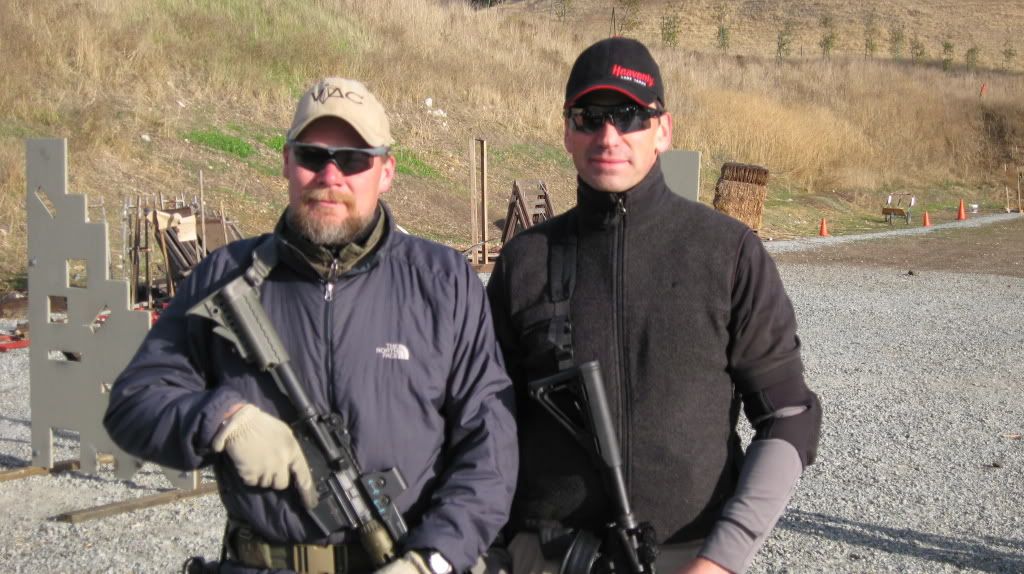
There were 14 students: two from the sheriff's department, two SWAT, one fireman, the others consisted of a doctor, a real estate broker, and others. So, a cross section of people.
This was a fast paced and physical class and not really suited for beginners. You had to keep sharp and on your toes!
I'm going to try and remember everything that was done as best I can.
Day One:
We started early Friday morning at about 8:00 a.m. at the 200 yard range setting up equipment and the first course of fire.
Kyle had us gather around for a brief lecture on ballistics and estimate range of targets based on the how the target appears in the reticle of a optic.
He then asked "How many rounds should you load into your 30 round magazine?"
Silence...
Then someone piped up: "28 rounds?"
Kyle replied: "I was having high hopes for this class, you should put thirty rounds in a thirty round mag. I like having more rounds available. The 28 round is B.S. I've always been able to seat my mag with the bolt closed with a mag loaded up with thirty rounds. You just have to do it correctly."
Then he demonstrated how to load a rifle and do a press check to make sure a round made it into the chamber. He advocates taking mag back out and indexing the first round to make sure it's on the left side of the mag. That way, even in the dark, you can be assured that a round was chambered.
I know many internet warriors that scoff at the thought of putting in thirty rounds in a mag but they are just compensating for carelessness and poor training.
We then moved to sighting in our weapons. We went from 25 - 100 yrds. sight in. At this time Kyle was evaluating the students skills etc. to gauge how the class should be run.
We learned many positions:
Kneeling:
Conventional kneeling, seated kneeling, Stretch kneeling. Some variations include a magazine and pistol grip stacked on shooters knee, and wrapping arm around front of magazine. We learned to use kneeling to shoot around corners. Also, we applied left hand kneeling in conjunction with support side shooting. One note was that it's not a good idea to have bone against bone. So, don't put your elbow on top of your knee.
We also learned roll over kneeling to allow to get shots from mid way between kneeling and th ground and then bent over kneeling allowing for very low shots to the ground. Used from behind car tires, for example.
Sitting Positions:
A lot of sitting positions. Conventional sitting position, spread legged sitting, front kee up or Rocking chair siting position. The "stacking your feet" sitting position used depending on the situation for example if on a hill overlooking a position etc.
Prone:
SBU prone (prone with weapon canted), roll over prone with the rifle lying flat on the ground and ejection port facing down, reverse roll over prone, Rice paddy prone, and regular prone.
We then proceeded to a drill that was thirty rounds total:
10 seconds to shoot 10 rounds from 25 yards prone.
5 seconds to shoot 10 rounds from 15 yards kneeling.
2.5 seconds to shoot 10 rounds from 7 yards standing.
I managed to get off 10 rounds in 2.58 seconds. That was pretty fun as I never shot my carbine that fast before. I could see a stream of shells in the air in my peripheral vision! Looked cool.
Just before lunch we were doing a drill and my LR300 broke! The rod on the bolt carrier group broke at the tip. Luckily, I brought a back up gun and got back into the fight. I only missed one drill which I wasn't happy about.
After an hour lunch break we continued with shooting from behind barricades. We learned to use the barricade for support and not shoot from a stand off position. He was getting us used to shooting with the adversary 200 yards and beyond. We used all the various positions we learned earlier this time applying it to the barricade. The barricades had slots of various shapes and at different heights cut into them plus one side was stepped. This allowed for maximum versatility in teaching various positions.
After the first day of training Kyle, Jason, another student and I met up together, after we got cleaned up, at a restaurant for a bite to eat and a beer. Kyle doesn't drink so he had non alcoholic drinks like non alcoholic beer and non-alcoholic cider. Kyle and Jason recounted some great stories during their years serving our country. I'm glad Kyle and Jason took the time to go out after class with us lowly students. The Viking Tactic Team is awesome! All in all a great time.
Day Two:
Support side shooting was taught. Kyle doesn't like to use the term "Weak Side". We learned how to transition from Master side to Support side in such a way as to allow the rifle to constantly be in the fight.
Malfunctions types and how to clear them.
Kyle's take on this was relate the malfunction type to the operation of the gun and not in terms of type I or type II etc.
He went through the carbine's firing cycle starting from pulling the trigger and what type of malfunction could occur at every step. Then then illustrated a few malfunctions by disassembling his rifle to show what the malfunction looks like.
Malfunction drill:
We broke into groups and put our rifles down range then the instructor would set each rifle up with a different malfunction. Each of us then had to clear every rifle and shoot it. That was a great drill plus I got to try out different rifles!
After that we learned turning and shooting, from left, from the right and facing rearward.
More shooting from a barricade from various positions in our own time. We each had a chance to practice shooting whatever position and transitions we wanted.
Timed drill shooting from each slot in the barricade. Here is where we really had to drive the gun and shove it into the slots and use the barricade for support. The Master side/Support side transitions were key and had to be smooth.
A drill to teach us how to move between targets and maintain a certain shooting cadence. That was pretty fun. I managed to engage three targets with two rounds each in the A zone in 1.96 seconds. I don't know how I did it but I just "let go" and went pretty fast.
Some interesting techniques and tips I learned from Kyle on how to shoot faster and smarter:
1. Snap to the target with the carbine. This allows more time to shoot.
2. Move your eyes to the next target and the body will follow.
3. Drive with your legs to the next target (for example horizontal movement) not torso or arms. This allows the rifle to maintain position.
4. Shoot with a constant cadence and switch between targets without changing that cadence. Don't shoot, stop, shoot, stop shoot for three targets it's just shoot, shoot, shoot and move in between. When hearing this style it sounds like a continuous shots string with no breaks.
5. Be aggressive and drive the gun from position to position when using the barricades.
6. Economy of motion. For example when speed reloading press the mag release button and the empty mag should fall out, no fancy flicking of the gun needed, put a new mag in feel the click the thumb should be in position to release the bolt release. Don't slap the bolt release. Releasing the bolt release button is a gross motor skill so during a stressful situation it will work.
7. Hold you rifle with the support side hand as far out as possible for increased stability and driving control.
8. When bringing the rifle up to get a sight picture you should never have to hunch down to meet it.
9. Finger off the trigger and safety on always unless you have a sight picture. (Something that was stressed so I put it here).
10. Maintain trigger control! No jerking or slapping the trigger. No "double taps" either! lol.
After the day was done we packed up and did a review of what just happened and went home to get ready for the next day.
Day Three:
We used the barricades quite a bit.
Support side transition shooting from kneeling using the barricades.
We started with the class in a line and we had to move between six barricades shooting from either side of each barricade one using the master side and switching to support side when needed. That was fun and once I got in the rhythm I could hustle along pretty quickly. There was always another student right behind you and if you fell behind you got tapped out and got back in line. I tapped out a few students, if I didn't the next guy would have tapped me out! Some students where pretty tired after this drill! One thing Kyle mentioned was when transitioning from one side of the barricade to the next don't point your rifle up because that would allow your rifle to be grabbed and that's no good because then it's useless. His point was always be aware of your muzzle and keep it directed towards the threat as much as possible during movement.
At this point the boys from mil spec monkey came by to film the rest of the day shooting. They were a bunch of great guys and set up a bunch of cameras. They had one student wearing a helmet camera to get a POV shot of the action.
Shooting on the move was next. After a brief demonstration we all lined up and had to walk parallel to six targets and engage them. Both from left to right and right to left.
Next up, Kyle set up the Viking Tactics Zig Zag Drill
We set up cones and had to move in a U shape while hitting our targets. This was a timed drill and used 18 rounds. It was pretty fun. I would have like to do that drill a lot but the whole class had to cycle through it one at a time so it used up a lot of the day. But it was worth it. We had to be very aware of our muzzles and whenever our rifles where not lined up on a target we had to have the safety on!
We learned to transition from our carbines to our pistols. The drill was set up to only have one round in the chamber we would engage the target and and when the carbine went dry we would transition. That means sling the carbine and draw our pistols and engage the target.
Kyle said that the only time you would transition is if your main weapon, in this case the carbine, went down somehow.
The transition was as soon as the gun went dry the strong side hand reaches for the pistol to obtain a master grip with the support side hand is moving the carbine out of the way in a controlled manner to the side then a 5(4)point draw is executed and the target is engaged.
Forward backward movement. Whenever we moved with the rifle and engaged targets thats when the class was at its best! Basically, bend the knees and put one foot in front of the other to encourage the foot to roll inward on each step.
Staggered barricade timed drill. This was pretty fun. I managed to transition to the three different barricades firing six rounds total plus one standing shot to the steel targets when starting in 58 seconds. I was a little slow because think about what I am doing to much. Others where getting in 45 seconds and a little better. Kyle did the drill in under 30 seconds. He's had a lot of practice and I could see that he completely optimized his movements. Too bad I can't practice that more.
At 3:30 the class was stopped and we spent 15 minutes cleaning up the brass and breaking down the barricades.
After that Kyle awarded us our certificates and gave prizes to the top three shooters (third place tied).
Then he opened up the Viking Tactics Store.
We all got a VTAC t-shirt, some 5.11 tactical socks for free and a 5.11 Tactical catalog with a coupon. I bought a VTAC sling and his book which he autographed "Green eyes and Black Rifles". He had hats, t-shirts, bags, all sorts of great stuff.
After the awards, free stuff and shopping the class all met later, with Kyle and Jason, at a local Pizza place to sit around and exchange stories and contact into etc. and eat pizza and, you guessed it, drink beer! We all had a great time and the all the students were top notch!
I have to say Kyle and Jason are greats guy and I loved the course. I learned a heck of a lot and can't wait to do his course again.


No comments:
Post a Comment